因需要架設網站主機來建置及做網站業務。我先試著用一台主機,想要在上面安裝 Proxmox VE ,然後在上面可以切出VM來跑各式系統及網站執行的環境。本篇文章會說明如何在Proxmox的VM上安裝Oracle Linux,並在上面安裝Docker及Portainer來管理WordPress網站。
會想要安裝Oracle Linux系統主要是原本的CentOS系統已經在去年底公告說不在更新維護,所以需要轉到跟它相近的Oracle Linux來使用。經過這兩天的研究,之間有遇到一些問題,不過後來都有找到方法解決。所以想想還是寫下來記錄一下。
文章目錄標題
安裝Proxmox
網路上有許多教人如何安裝Proxmox的文章,我也是從網站上找到相關的教學文章跟著灌。細節我就不多說,各位可以上網自己Google。
首先製作安裝隨身碟
官方將Proxmox VE製作為易使用的安裝程式,首先到官方網站下載最新版的安裝 ISO映像檔:
https://www.proxmox.com/en/downloads/category/iso-images-pve
接著製作開機隨身碟工具,官方推薦Etcher來燒錄,可以到Etcher官方網站下載。
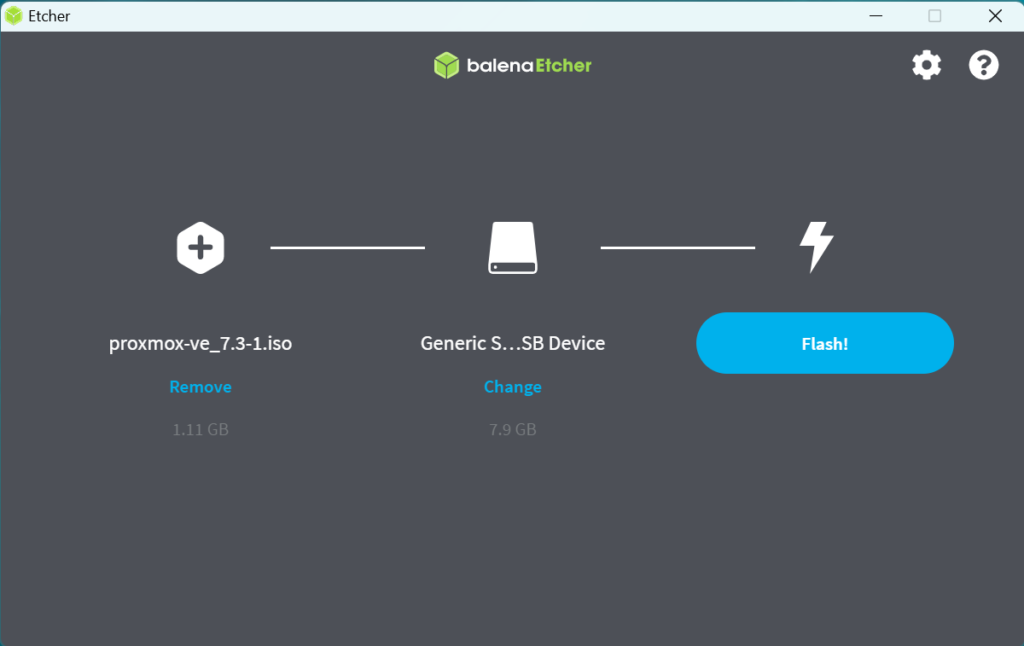
基本上就是將Proxmox VE ISO檔拖至Etcher視窗,選擇要製作開機用的隨身碟(容量至少16GB以上),按下Flash!就可以開始燒錄。
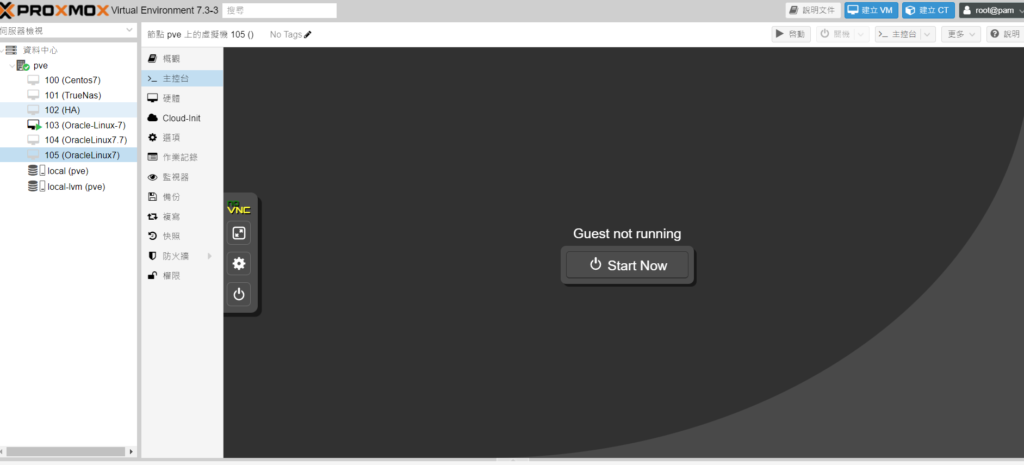
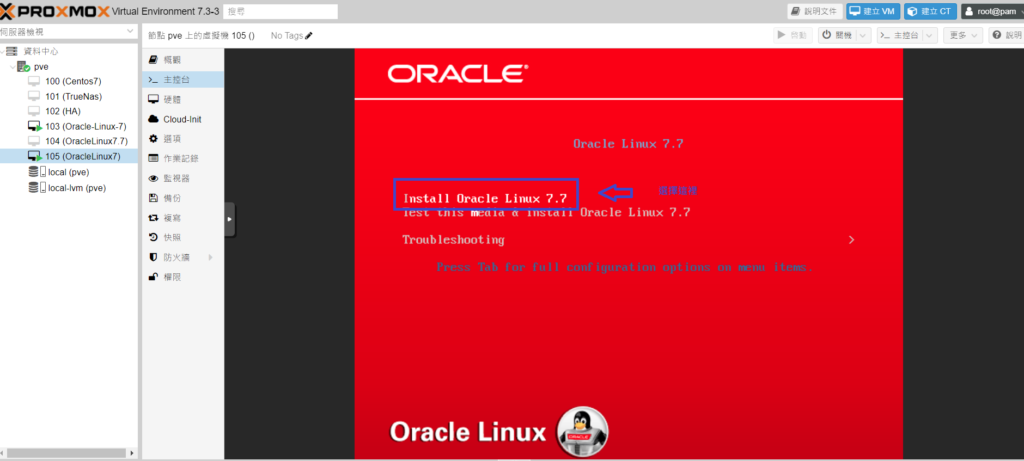
開始安裝系統
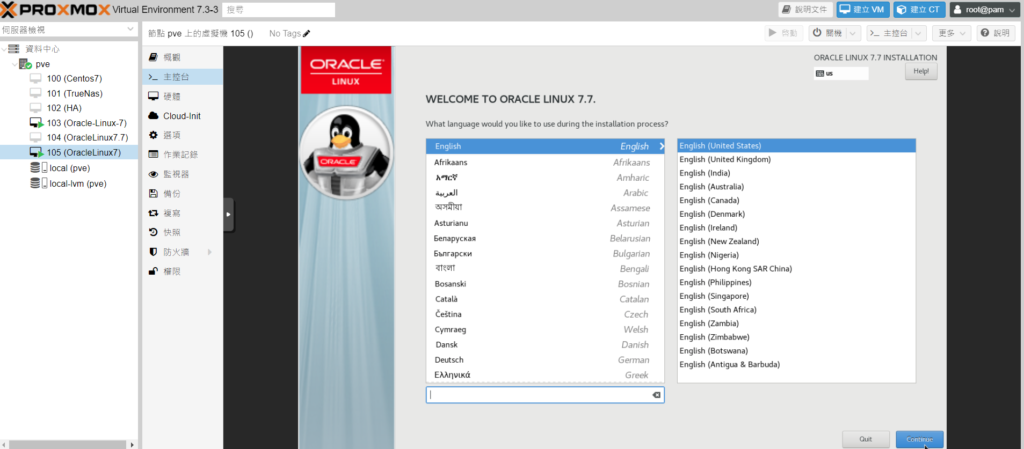
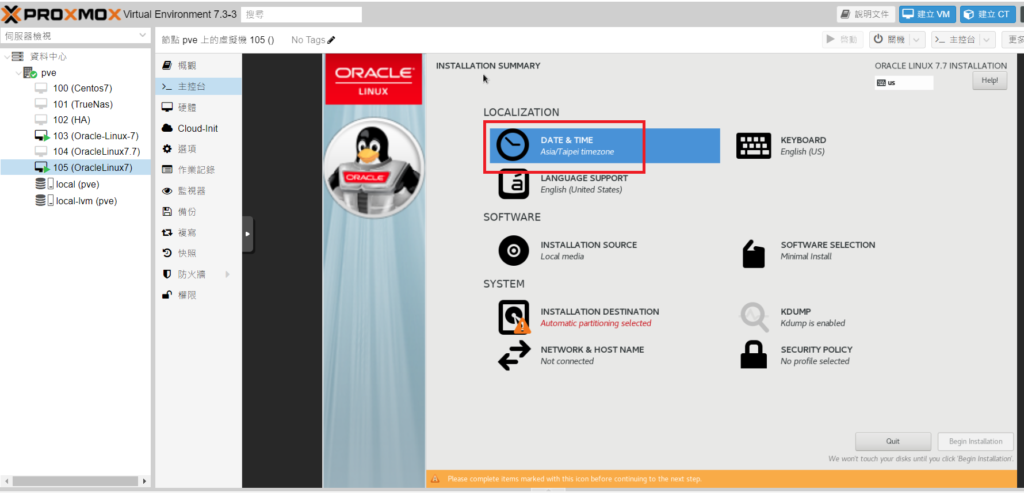
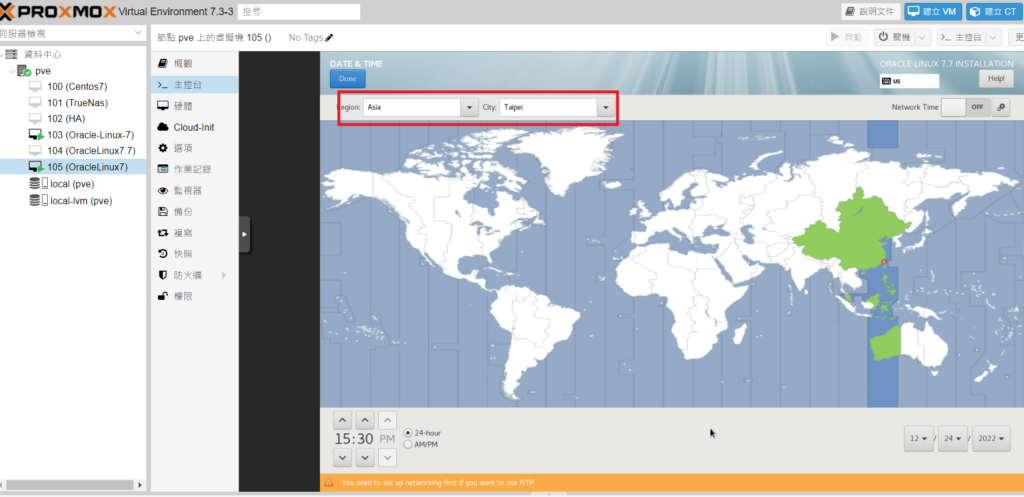
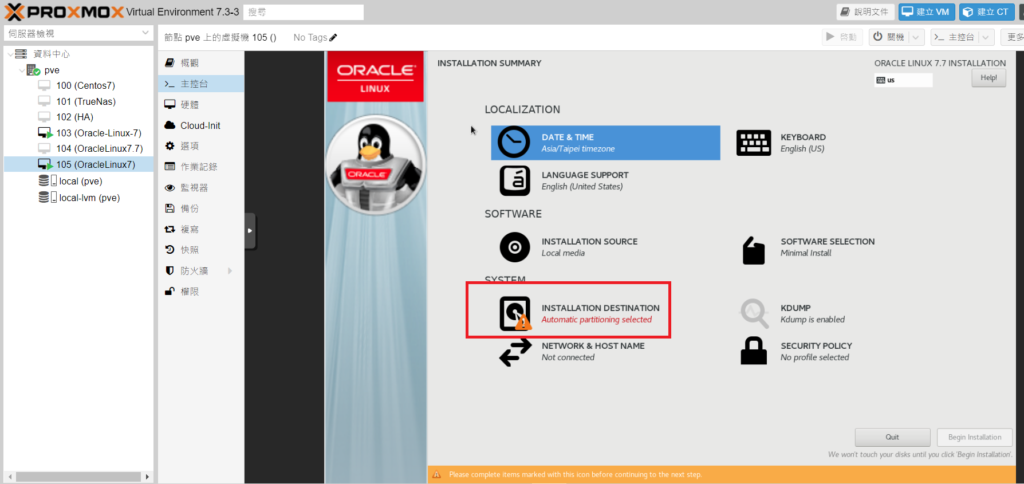
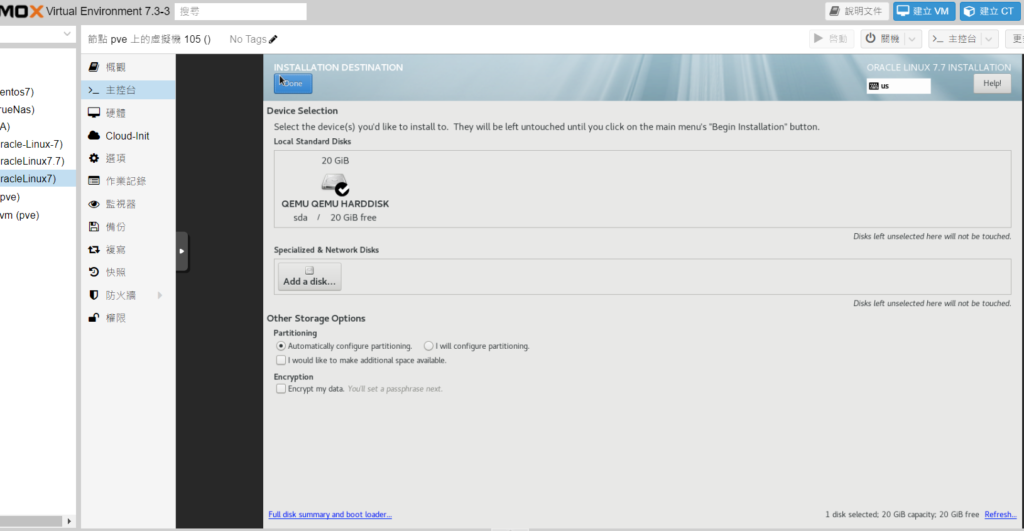
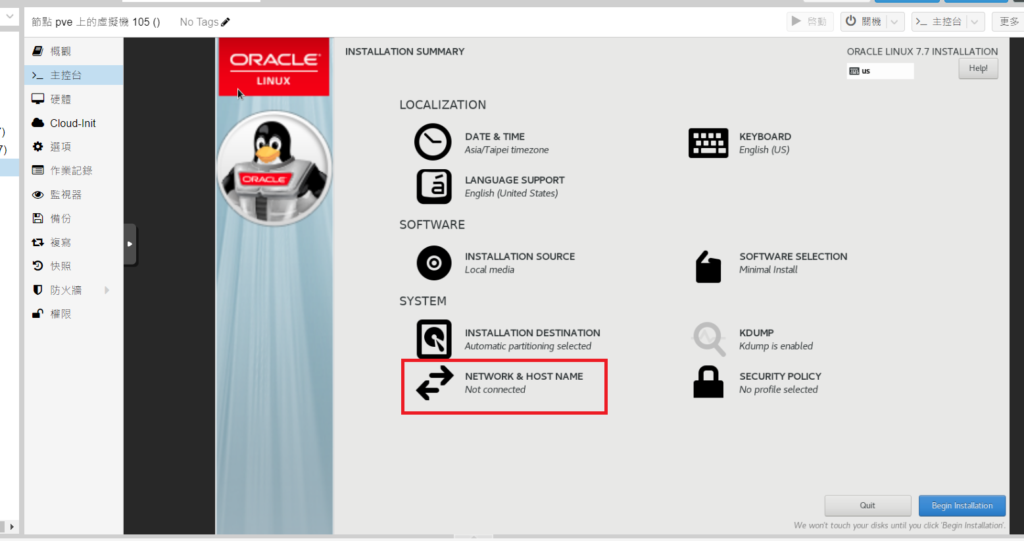
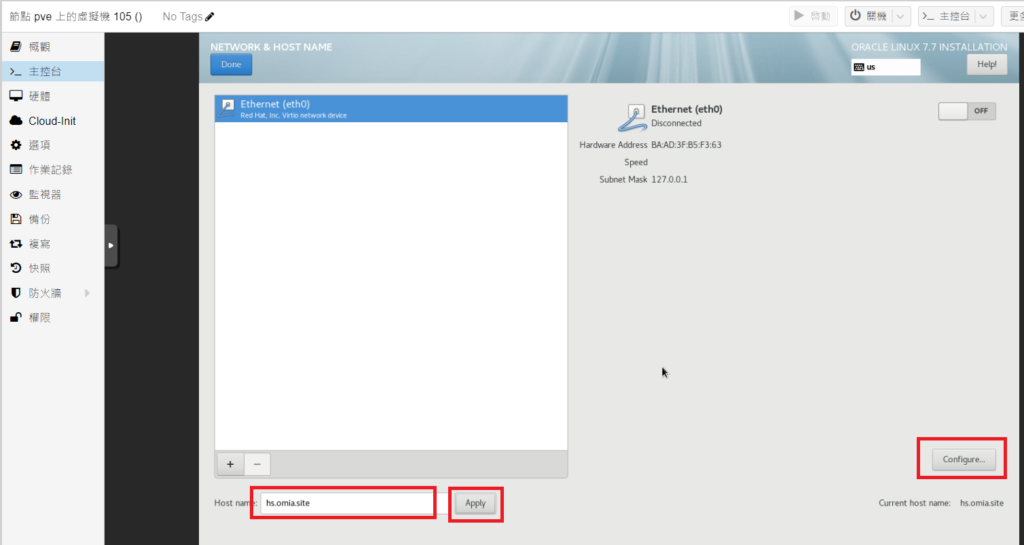
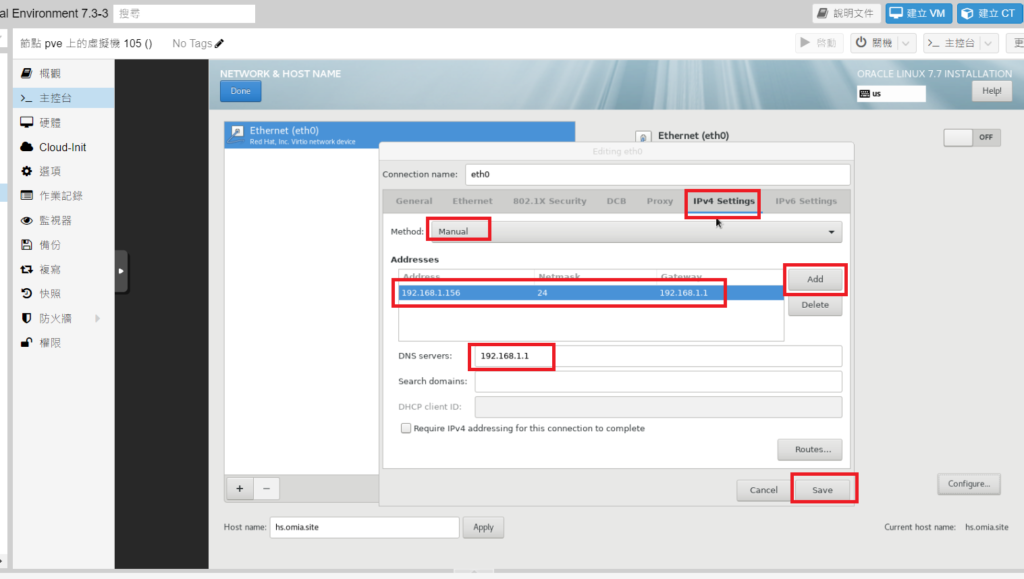
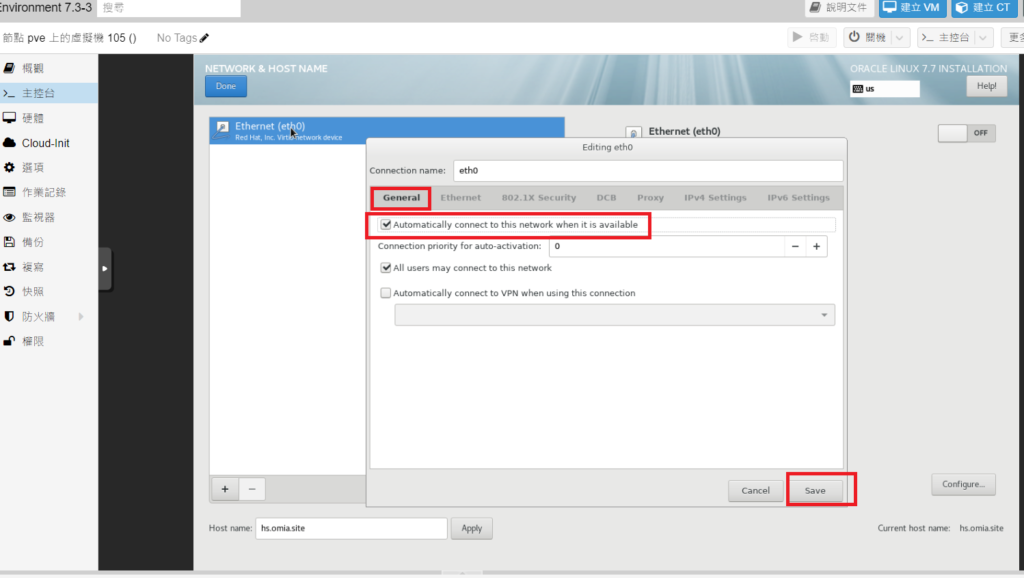
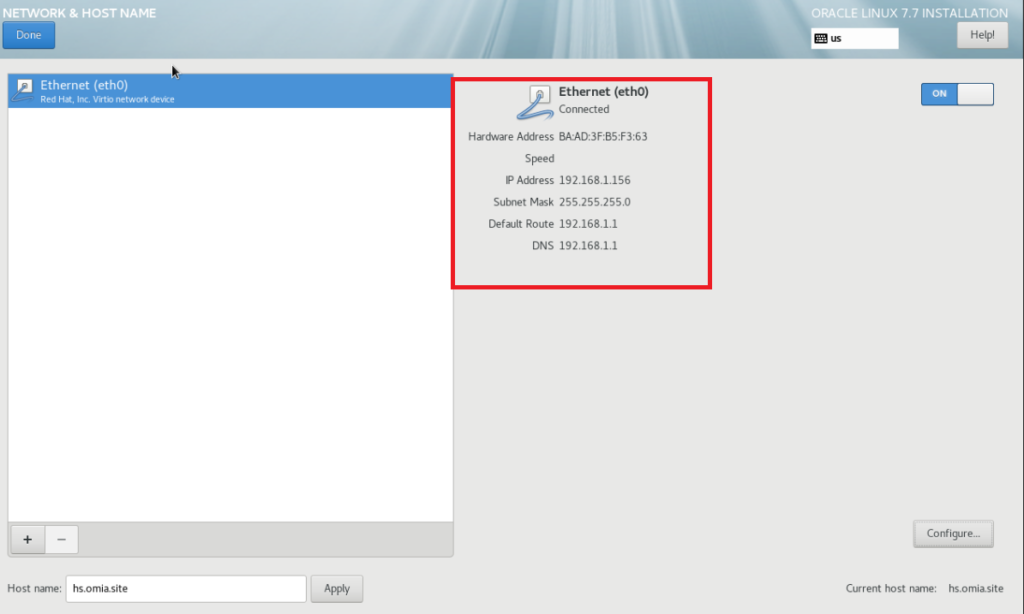
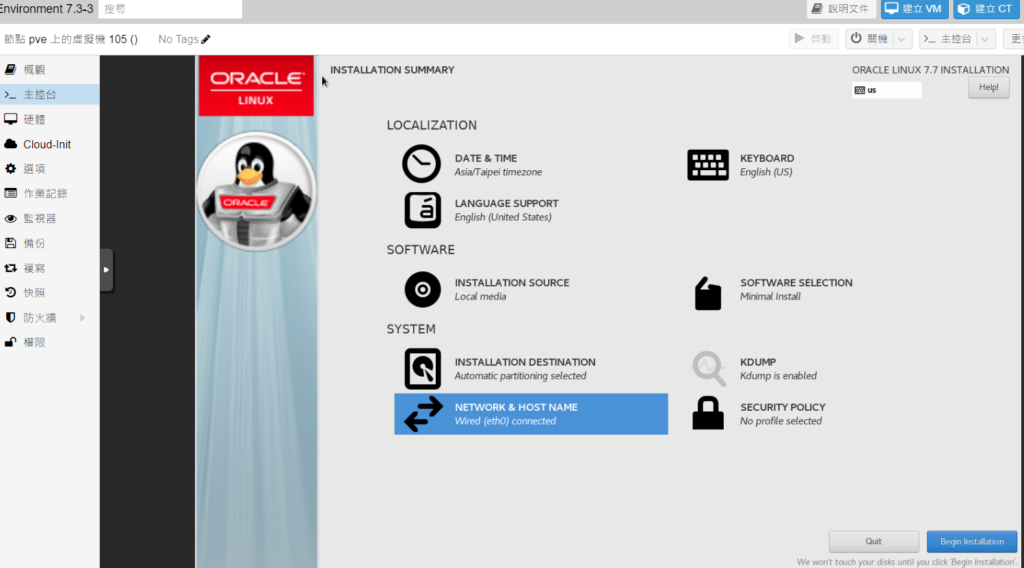
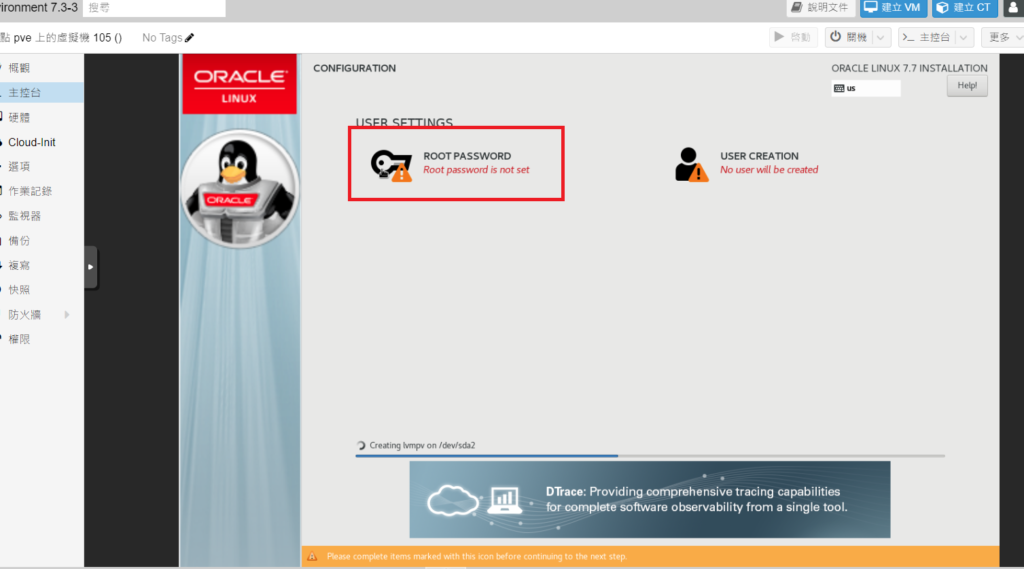
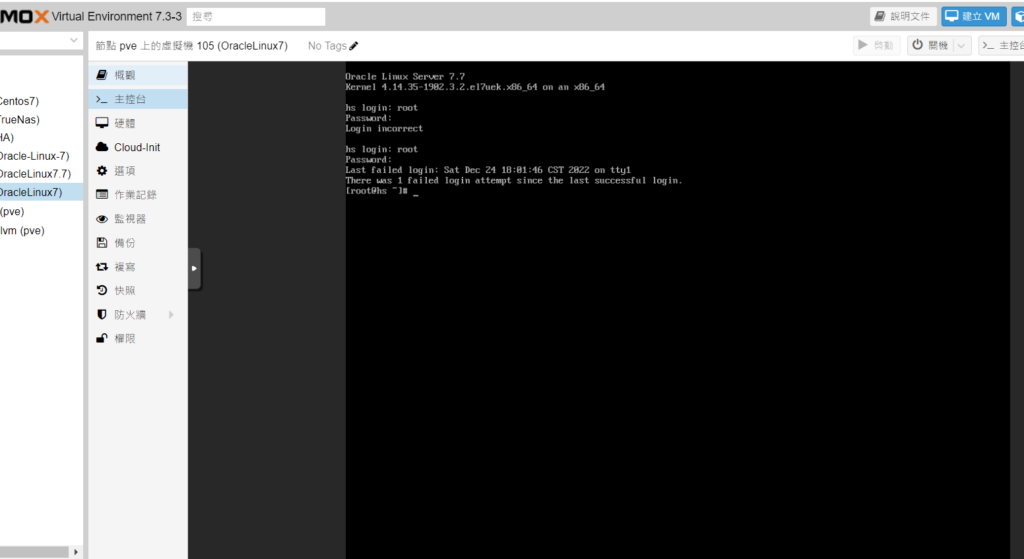
使用Proxmox VE安裝隨身碟開機後,會停留在開機選單,這裡選擇第一項 Install Proxmox VE 進入。接著依序點選 I agree 下一步、選擇磁碟與檔案系統、選擇使用ZFS檔案系統、選擇要安裝Proxmox VE 作業系統的目標磁碟、選擇地區時區與鍵盤配置、設定管理者密碼及信箱、設定網路相關配置、檢視安裝設定項目,最後安裝完成。基本上我都依預設下去設定安裝。
安裝完成後,可以看到它會出現剛剛設定的ip:8006 port這樣的畫面,我們只要用瀏覽器輸入就可以連到Proxmox VE了。
建立VM
在瀏覽器輸入IP:8006後,我們進入到Proxmox VE系統,因為我要建立一個VM,並在VM裡面安裝Oracle Linux系統,首先我要到Oracle Linux下載ISO映像檔。
[Oracle Linux iso安裝檔案下載]
https://yum.oracle.com/oracle-linux-isos.html
[上傳ISO映像檔到Proxmox的local的ISO映像]
可以先從Oracle Linux官網上下載ISO映像檔,再選擇上傳到Proxmox的local的ISO映像區,也可以選擇先複製網址,再由ISO映像中的”從網址下載”處下載ISO映像檔
接著是建立VM,直接按下”建立VM”按鍵,然後再依序設定完成。
以上是建立VM的設定步驟。
安裝Oracle Linux
接下來為安裝Oracle Linux作業系統,直接到VM的>_主控台處,按下啟動,讓它開始安裝。
用鍵盤選擇「install Oracle Linux 7.7」並按下鍵盤「Enter」進行安裝步驟
我用預設的英文語系進行安裝,點選「Contiune」進行安裝
時區設定:直接用地圖選擇地點、城市。選Asia、Taipei,再按下Done.
這裡需要注意,我有遇到當安裝時跳到這個畫面,它的鍵盤會當掉,這時就是將VM再重新開機一次就可以解決這個問題,我上網尋找時也有一些人遇到這樣的問題,解法也是說再重新啟動一次。
選擇安裝硬碟「INSTALLATION DESTINATION」選剛剛預設的20GB這個即可。
設定網路
(1)、點選「NETWORK & HOST NAME」
設定主機名稱
01.輸入主機名稱,本範例採用「hs.omia.site」,你可以輸入自己的主機名稱
02.套用主機名稱,點選「Apply」
03.設定IP資訊,點選「Configure」
設定IPv4 IP
01.點選「IPv4 Settings」
02.Method:選擇「Manual」
03.點選「Add」新增IP
04.輸入IP資訊,這裡我用Address為「192.168.1.156」、Netmask「24」、Gateway「192.168.1.1」
05.DNS server這裡我用「192.168.1.1」
設定網路卡自動連線
01.點選「General」
02.勾選「Automatically connect to this network when it is available」
03.點選「Save」完成IP設定
確認IP設定值
此時系統應該以順利套用IP設定,從別台電腦應該要可以ping剛剛設定在系統的IP,如果確定無誤後就點選「Done」繼續安裝步驟
然後就是點選「Begin installation」,開始安裝系統
設定系統管理者密碼
在系統安裝過程點選「ROOT PASSWORD」進行管理者帳號密碼設定,密碼兩個地方要輸入相同,完成密碼設定後,就是讓它自動完成系統安裝。待安裝完成後,再點選「Reboot」,並將安裝的光碟移除,完成開機後,就可以登入Oracle Linux系統。
登入系統,系統重新開機後,帳號輸入root,密碼輸入安裝過程所設定的密碼,驗證是否可以順利登入系統。
以上為Oracle Linux的安裝步驟。
安裝Docker及Portainer
系統更新
首先,執行系統更新命令,重建repo的cache,並更新已安裝的套件。
sudo yum update
遇到選擇,就輸入y
安裝yum配置管理器
要在不通過 repo 文件的情況下新增repository並編輯以插入repository URL,我們可以使用 yum-config-manager 工具。如果您使用的是最小服務器版本,那麼您可能沒有它。下面是安裝它的指令。
sudo yum install -y yum-utils
註:下命令最好使用SSH工具連線作業,若是在Oracle Linux預設的命令視窗中,它是無法複製貼上命令的。
將 Docker repository新增到 Oracle Linux 並更新Repo
由於 Oracle 就像 CentOS,因此我們可以使用 Docker 開發人員官方提供給使用者的 CentOS repository。在這裡是在 Oracle Linux 8 或 7 上新增相同內容的命令。
sudo yum-config-manager --add-repo https://download.docker.com/linux/centos/docker-ce.repo
sudo yum update
遇到需要更新選擇時,一樣輸入y
在Oracle Linux上安裝Docker-Ce的命令
輸入下列命令
sudo yum install docker-ce docker-ce-cli containerd.io
若遇到下面的問題
解決的辦法是到 /etc/yum.repos.d/docker-ce.repo檔案的尾端,新增下面的内容
[centos-extras]
name=centos extras -$basearch
baseurl=http://mirror.centos.org/centos/7/extras/x86_64
enable=1
gpgcheck=0
然後再重新安裝一次
yum install -y docker-ce docker-ce-cli containerd.io
通過以上的設定,我的問題就解決了,希望可以幫到大家。
遇到選擇,一樣都輸入y
到上面這裡,總算成功安裝docker-ce
啟用並啟動docker服務
安裝 docker 後,執行其daemon 並將其標記為已啟用,以便它可以隨系統啟動自動啟動。
sudo systemctl start docker
sudo systemctl enable docker
測試安裝
您可以執行 hello-world docker 來測試安裝
可以試著下命令驗證docker service的執行狀態
systemctl status docker
docker安裝完成後,順便可以安裝Portainer,方便之後管理及維護WordPress網站。可以直接下下面的命令
docker run -d -p 9000:9000 -v /var/run/docker.sock:/var/run/docker.sock -v /home/docker/portainer:/data --name portainer --restart=always portainer/portainer
到此為止,就算完成我想要的工作環境建置了。只要在瀏覽器上輸入IP:9000就可以在Portainer上作業,也可以用Nginx 設定網域的DNS給IP:9000,這樣就可以在任何一台電腦或手機上的瀏覽器作業。
例如我剛架好的這台Oracle Linux的IP是192.168.1.156,我將它在Nginx上指定為docker156.omia.site的子網域,我就可以從瀏覽器上直接連進Portainer工作了。
結論
以上就是如何在Proxmox的VM上安裝Oracle Linux,並在上面安裝Docker及Portainer的步驟,文章有點長,需要消化一下。